
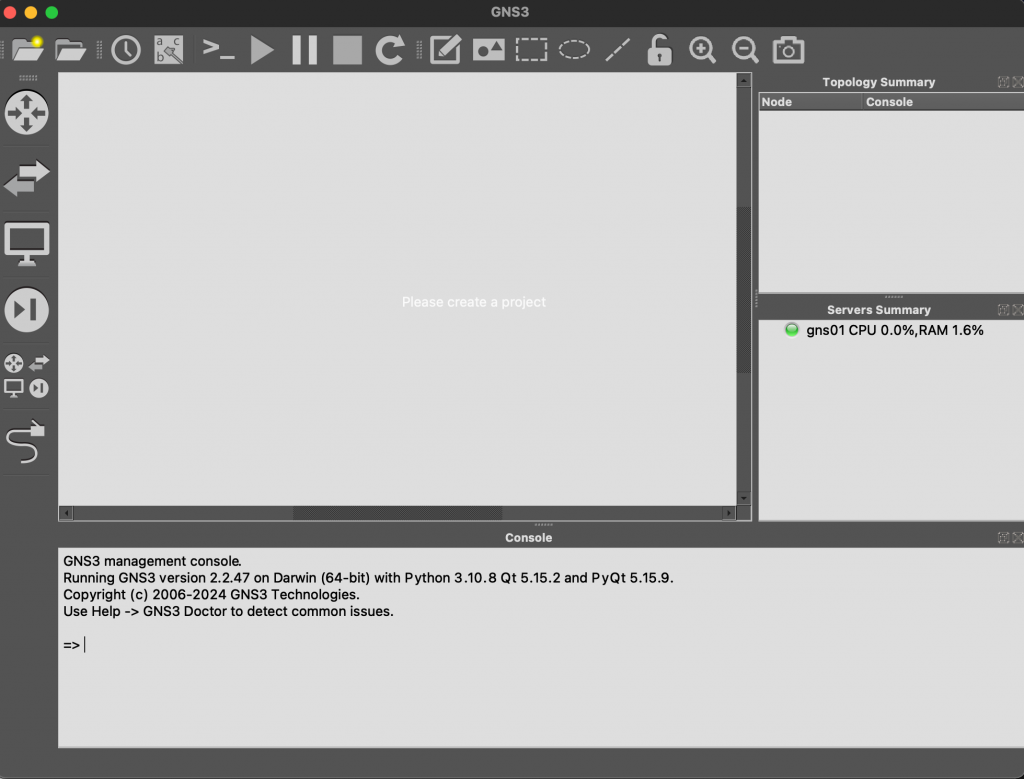
Alright, we have a tight time budget, you know the drill. Let’s get started creating your own virtualized networking lab. In our case, we will use the software GNS3 for this task, but please note, that there are other options to choose from, such as EveNG or even Containerlab (the latter one more for the experienced user). Let’s quickly run over the things you will need.
Shopping list
- You will need some sort of compute (let’s call it server from now on), this can be an old gaming pc or a real server bought off of ebay or craigslist. But please, make your life easy and get at least something with the following specs:
- At least 8 cores (preferably 8 physical cores, but 4 physical and 4 virtual will get you started as well)
- At least 8 GB of memory, but please treat yourself good and invest in 16 GB. It makes your life easier
- At least 256 GB of SSD storage. HDDs do work, but with virtualization, you want a high number of I/Os per second and HDDs just aren’t fast enough
- Try to get more than one networking jack, if you want to connect real hardware to your setup. You can also add additional jacks via PCIE-cards.
- Some ethernet cables and a router with ethernet jacks.
- A fresh install of your favorite linux server image on the server.
- A notebook for setting things up on your server.
- Some snacks and a large soda.
Prerequisites
You should already have a working installation of linux on your server. I won’t go into any detail about this, as this depends heavily on your operating system choice. In my setup, I used a fresh Debian 11 installation.
As we wan’t to remotely connect with our server, we will need it to be on the network and preferably have a static IP-address. Depending on your router’s DHCP server, you can statically assign the server an address via the router. If this is not possible in your router, you can manually assign the server an address which is outside the DHCP range of your router. It will definately tell you its range. As the latter approach is also dependant on your operating system, I won’t go into detail on how to do this.
The last thing you will need to prepare is SSH. It does not matter if you connect via username / password or have key-based authentication. Both will work.
Installing GNS3
The next step for you is to install GNS3. I will guide you through the installation, but please note, that this process is prone to change, so here is a quick reference to the official documentation: https://docs.gns3.com/docs/getting-started/installation/linux.
Firstly, you need to make sure that python3 as well as pip are installed and up-to-date:
sudo apt install python3 python3-pip -yAfter that, check pip works correctly by doing the following (don’t ask why the user is jonathan):
jonathan@gns01:~$ pip3 --version
pip 24.2 from /home/jonathan/.local/lib/python3.9/site-packages/pip (python 3.9)
Alright, now that pip is ready, installation of gns3 is quite simple. It’s just one command:
sudo pip3 install gns3-serverAfter the installation, you should be able to start gns3 via this command:
jonathan@gns01:~$ gns3server
No configuration file could be found or read
2024-08-31 11:06:45 INFO run.py:218 GNS3 server version 2.2.47
2024-08-31 11:06:45 INFO run.py:220 Copyright (c) 2007-2024 GNS3 Technologies Inc.
2024-08-31 11:06:45 INFO run.py:242 Running with Python 3.9.2 and has PID 1706
2024-08-31 11:06:45 INFO run.py:78 Current locale is de_DE.UTF-8
2024-08-31 11:06:45 INFO web_server.py:338 Starting server on 0.0.0.0:3080
2024-08-31 11:06:45 INFO __init__.py:70 Load controller configuration file /home/jonathan/.config/GNS3/2.2/gns3_controller.conf
2024-08-31 11:06:45 INFO __init__.py:74 Controller is starting
......
But as you might notice, this starts it in the foreground and as soon as this shell closes, the gns3server is being stopped, which might not be good when doing a lab. So I created a service file and let it start on boot. This is the content of my service file:
[Unit]
Description=GNS3 server
Wants=network-online.target
After=network.target network-online.target

[Service]
User=root
Group=root
ExecStart=/usr/local/bin/gns3server

[Install]
WantedBy=multi-user.target
It is saved to /lib/systemd/system/gns3.service. Please note, that the service is running as root. I would recommend doing it this way, as this makes some networking settings easier, for example connecting real hardware with your lab and using some kinds of virtual appliances.
After you’ve created the file, it is only a matter of doing the following:
jonathan@gns01:~$ sudo systemctl enable gns3.service
Created symlink /etc/systemd/system/multi-user.target.wants/gns3.service → /lib/systemd/system/gns3.service.
jonathan@gns01:~$ sudo systemctl start gns3.service
The last thing you need to verify your installation is hopping onto a browser of your choice and opening your_server_ip:3080. You will be greated with a warm welcoming screen:
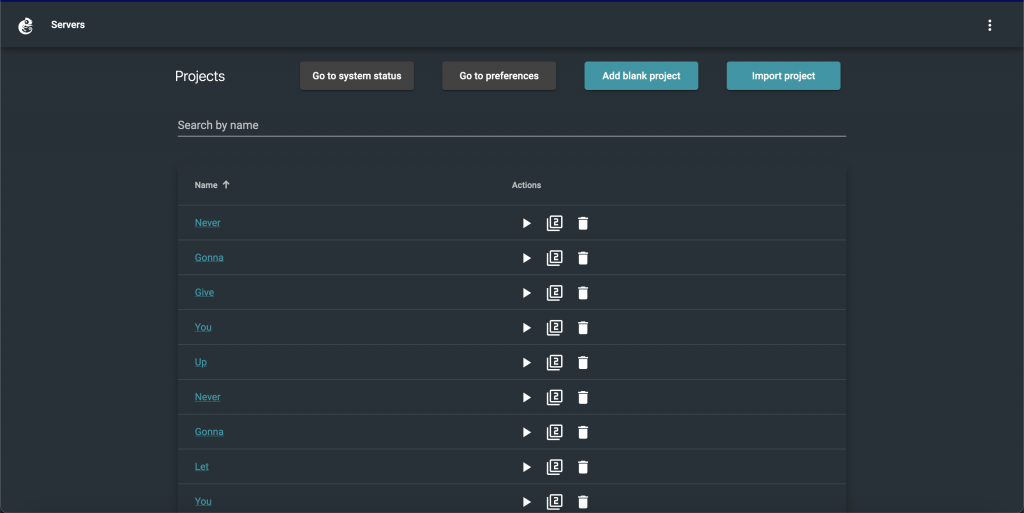
Please excuse the project mess, as this is my production GNS3 server 🙂
Using the desktop client
Now, you can totally use GNS3 with the web-application. But I would REALLY recommend you to use the desktop client. It has some nice advantages, such as being able to capture traffic between devices (which not only makes troubleshooting easier, but also helps you understand the concepts of different protocols).
You can find a download of the client here: https://github.com/GNS3/gns3-gui/releases. There is only one minor disadvantage: you have to exactly match your GNS3 server version with the GUI version. So how do you find your server version? Just open GNS3 in your browser and scroll to the bottom, there it will tell your the version of the WebUI, which exactly represents your server version, for example:

In my case, the version is a little bit outdated, but it doesn’t mind me, as this server is not available from the public internet. So I download the GNS3-GUI for version 2.2.47. Yours may differ.
After Installing, you may be greated with this screen:
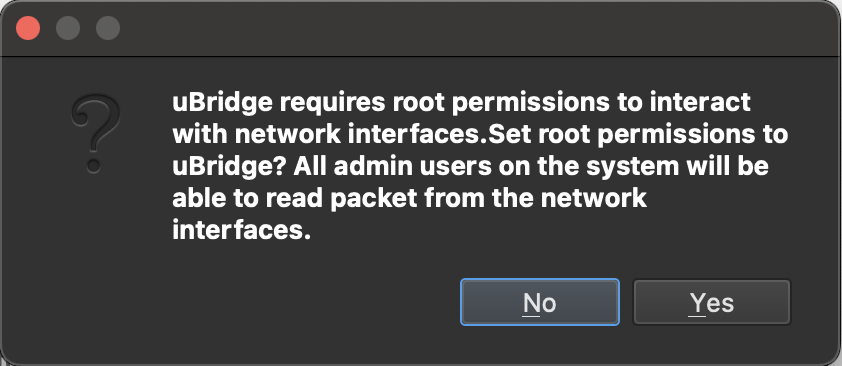
If this is the case, please press “No”, as we are running GNS3 on a separate server thus not needing ubridge.
After that, the GNS3-GUI should open and it wants you to configure it.
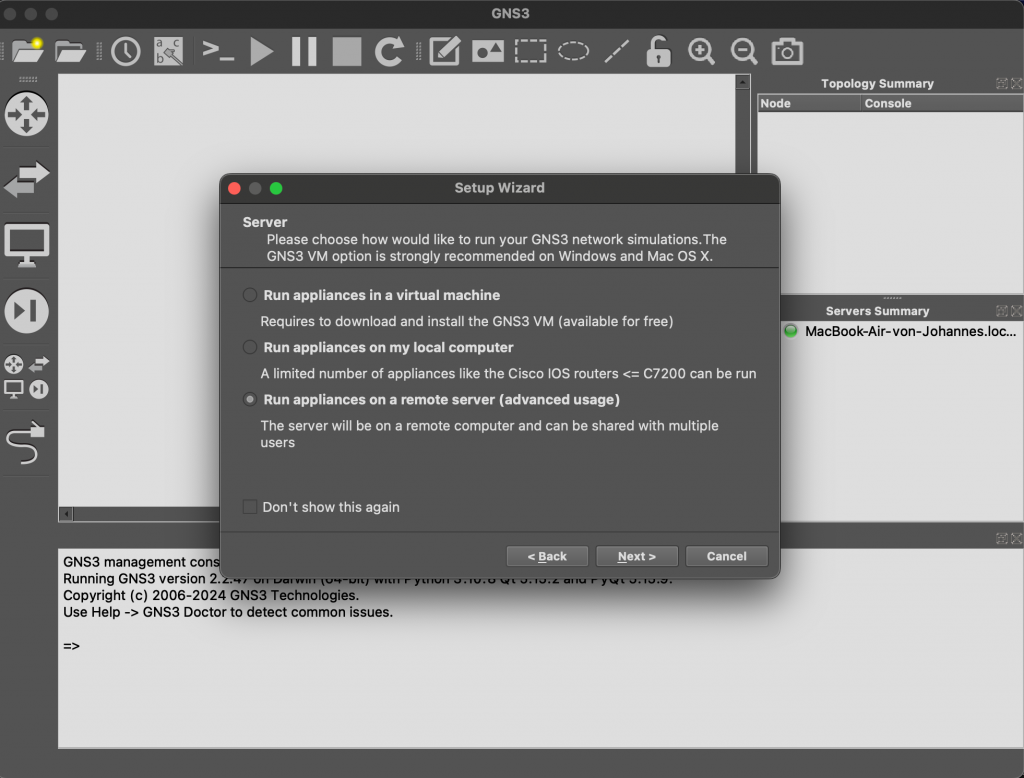
The setup wizard want’s to know, where GNS3 ressources should be run. You can also run it all on your local system, but using an external server oftentimes gives you more compute. So we select the latter one and press “Next >”.
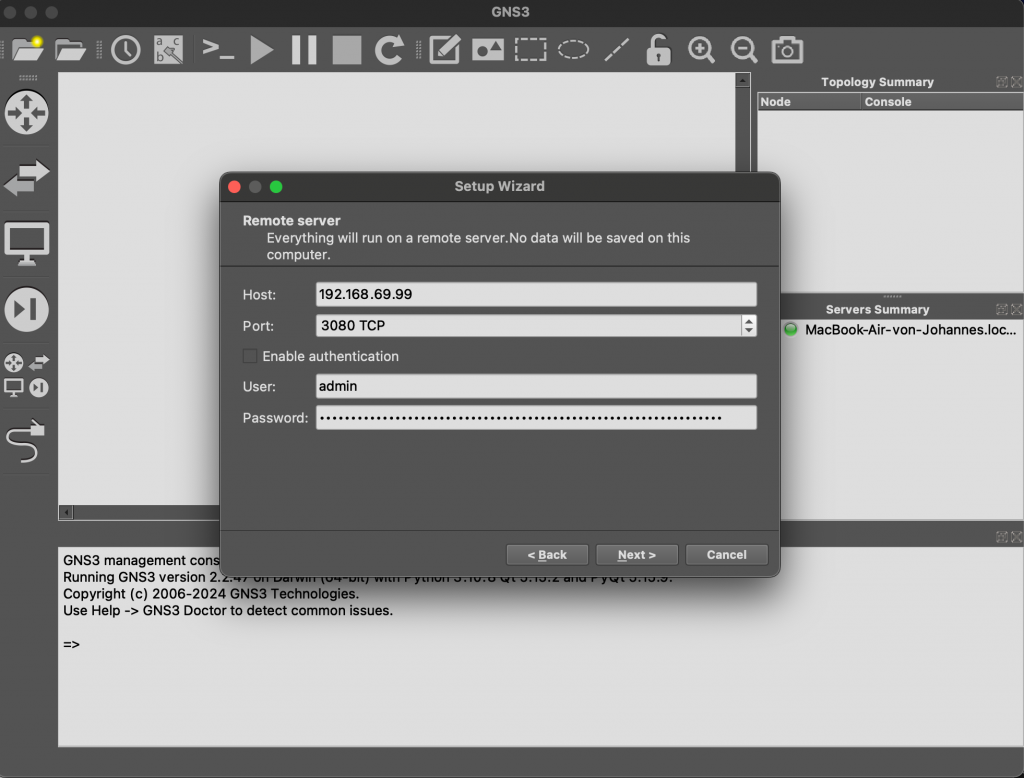
On the next screen, you need to fill in the IP-address of your server. The port can be left default. If you decided to enable authentication on your server (although I did not tell you how to do it. So you must have been going ahead, you naughtynengineer), you will need to provide the login credentials. Otherwise uncheck the “Enable authentication” checkbox. Then press “Next >”.

This screen just summarizes your settings. Please check them before the configuration will be saved. After clicking the “Finish” button, you will be greated with an empty canvas.
As you can see on the right pane, there it says it is connected to the server. It will also tell you the ressource utilization, which is oftentimes really convenient.
Importing virtual appliances
The next step would be to import your desired virtual appliances, in order to create your very first networking topology. In my case, I imported an virtual MX (vMX) image to the server. As this is quite a complicated process, I will link to the official documentation, which tells you all about this process.
Creating your first project
is as simple as clicking “File” > “New blank project”. You then just need to give it a name an press “Ok”. That’s it.
Creating the topology
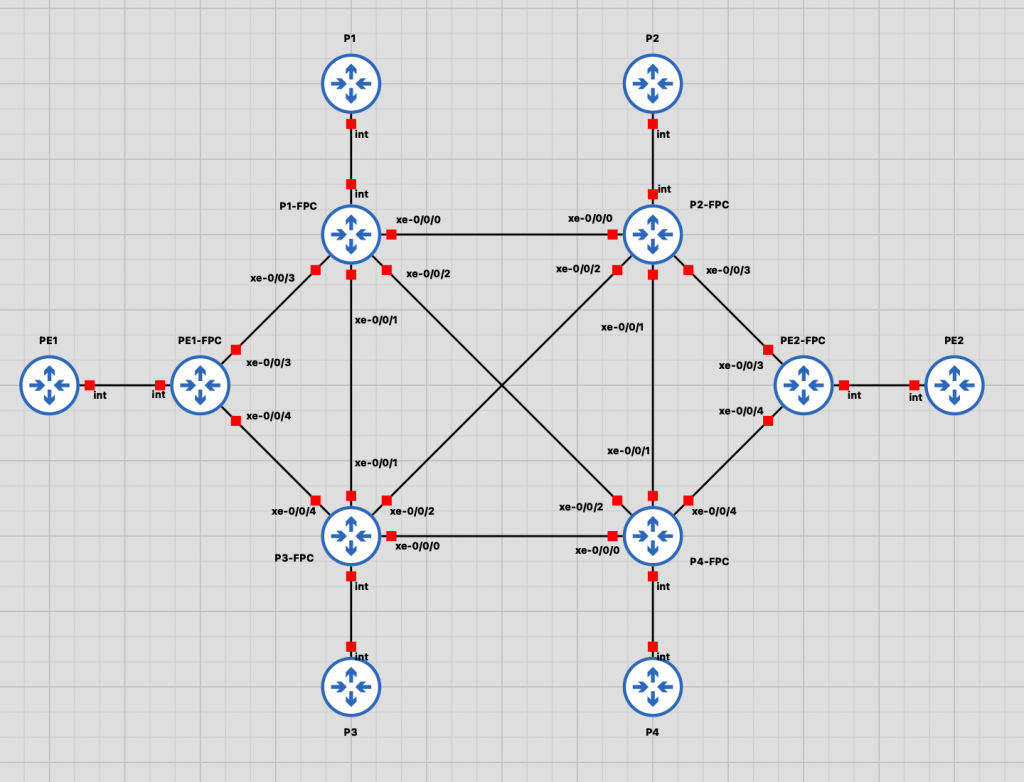
Okay, i have to confess something. I created this post so you can create your very own version of the MXimal Performance Lab. But this should be really convenient for you, as this is a great, universal starting point. I will walk you throught the steps.
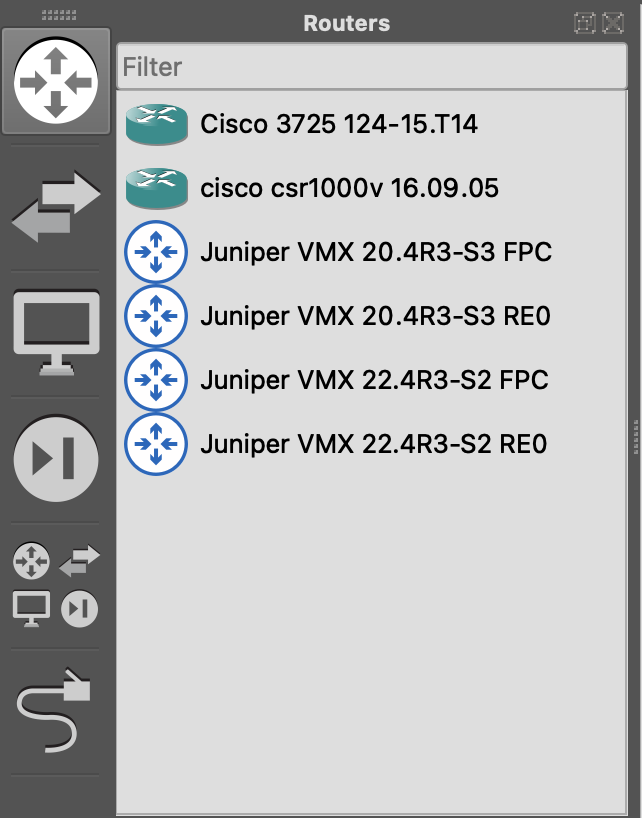
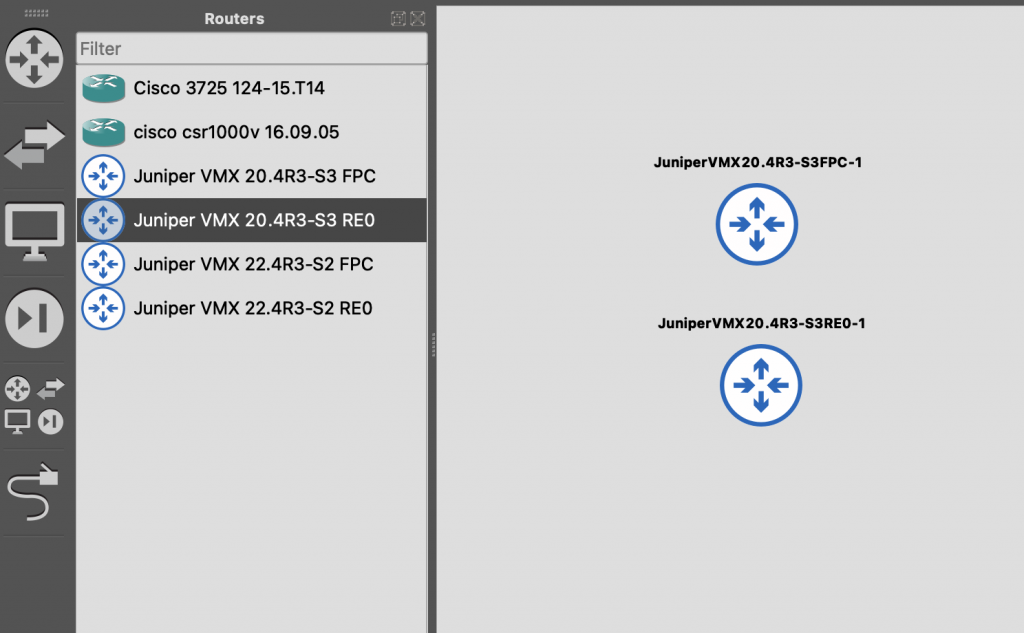
First, you need to open the device browser. As the vMX is a router, I will open the router tab. Inside this list, you will see different appliances.
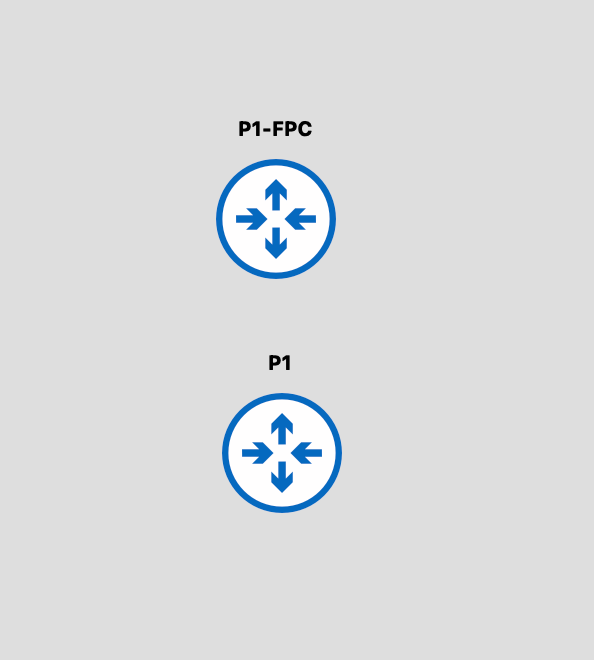
Now, as you already read in the guide on how to import the vMX into GNS3, modern vMX images are split into two. One appliances is the routing engine, the other one is the actual FPC. In our deployment, we will always connect one of each to one another and call it one vMX. Begin, by dragging and dropping one RE0 and one FPC appliance onto the canvas. Please note, in my case, I have two different versions. Both appliances need to be of the same version.
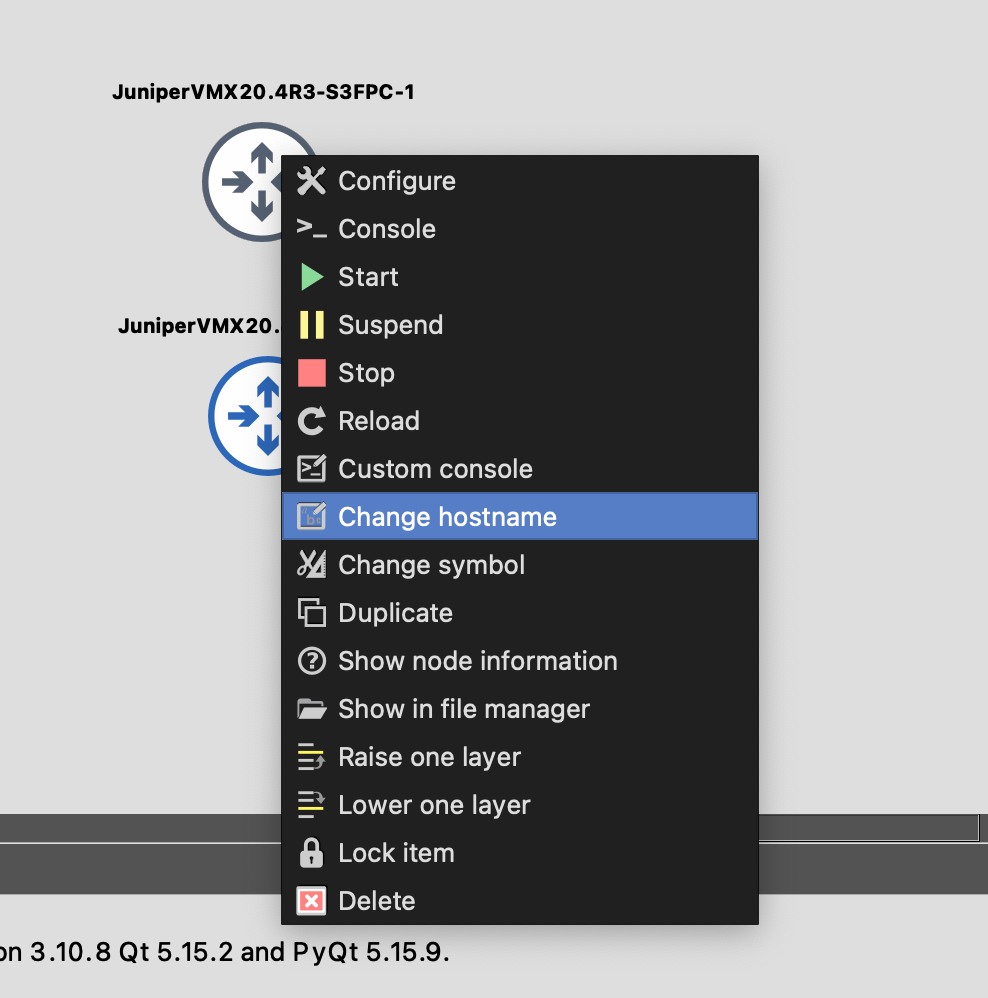
The next thing I always like to do is renaming the appliances. My naming scheme is always the hostname for the RE0 and hostname-FPC for the FPC. If you want to change the hostname of one appliance, just do a right-click and select “Change hostname”.
Inside the popup, enter your desired hostname and press “Ok”. If you’ve done that, it could look something like this:
The last thing is to connect both the appliacnes to another. For this, we connect both “Internal” ports of the appliances to each other. Depending on your exact setup, the second port might have a different name, but if you just use the second option in the dropdown, everything should be fine. To connect virtual ports, select the “Wire” icon in the left-side toolbar and just click on the first appliance. A popup showing all available ports will be visible.
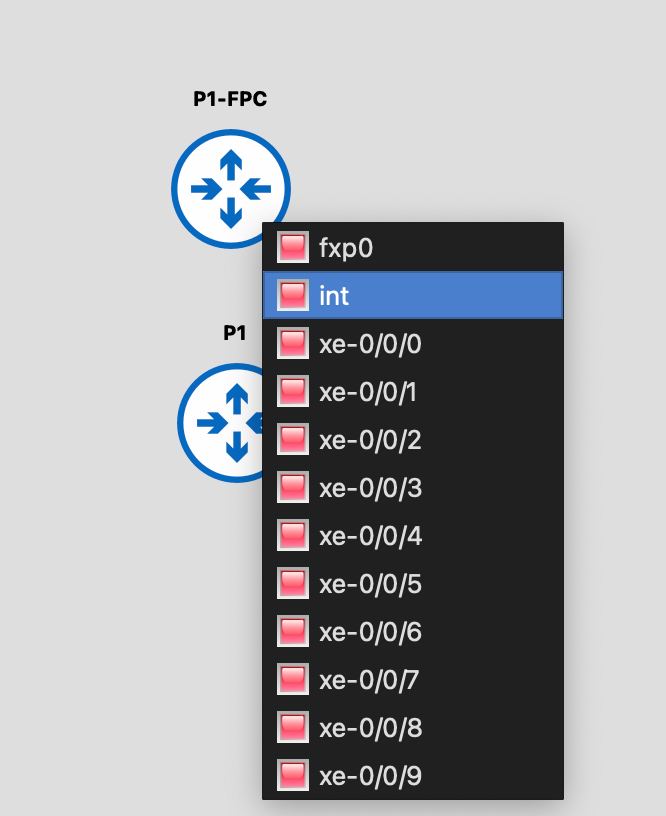
After selecting the second port, click on the other appliance.
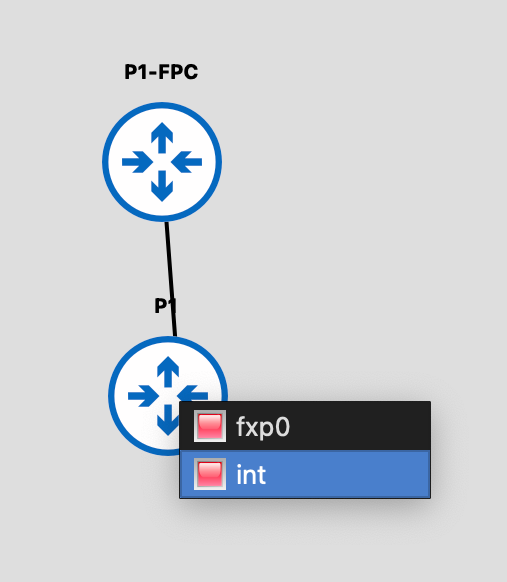
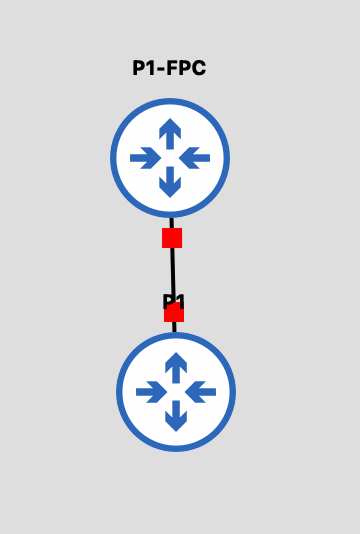
If you’ve connected them successfully, it should look something like this.
Eat, sleep, connect, repeat
Alright, now you know how to connect different appliances to each other. You can build your topology as you desire.In my case, I created the topology for the MXimal Performance Lab. One little tip, if you want to keep things clean, you can activate the “Snap to the Grid”, “Show the Grid” and “Hide/Show interface Labels” Features under the “View” tab on top of the program. This way, you will have interface labels and perfectly placed nodes.
One thing to note: please always remember that you connect the port on the FPC appliance, not the RE (it also only has two ports, so this won’t be a problem).
This is how my topology looks like (don’t be scared if your ports refer to ge-0/0/X instead of xe-0/0/X, it is just how I named mine).
Starting & configuration
Alright, we are really close on finishing up. The next step is to start all appliances. Just press the green “Play” Button in the top bar.
Caution: This setup is really power hungry. My server is equipped with enough ressources to handle this topology (20 Threads, 48Gigs of RAM). If yours isn’t as powerful, this topology might not work, so you might need to scale down the amount of devices.
The initial boot of a vMX takes a couple of minutes, as it is expanding the filesystem and doing stuff. Just be patient.
After waiting 15 minutes, I now will be able to configure the vMX. For this, do a right click and select “Console”.
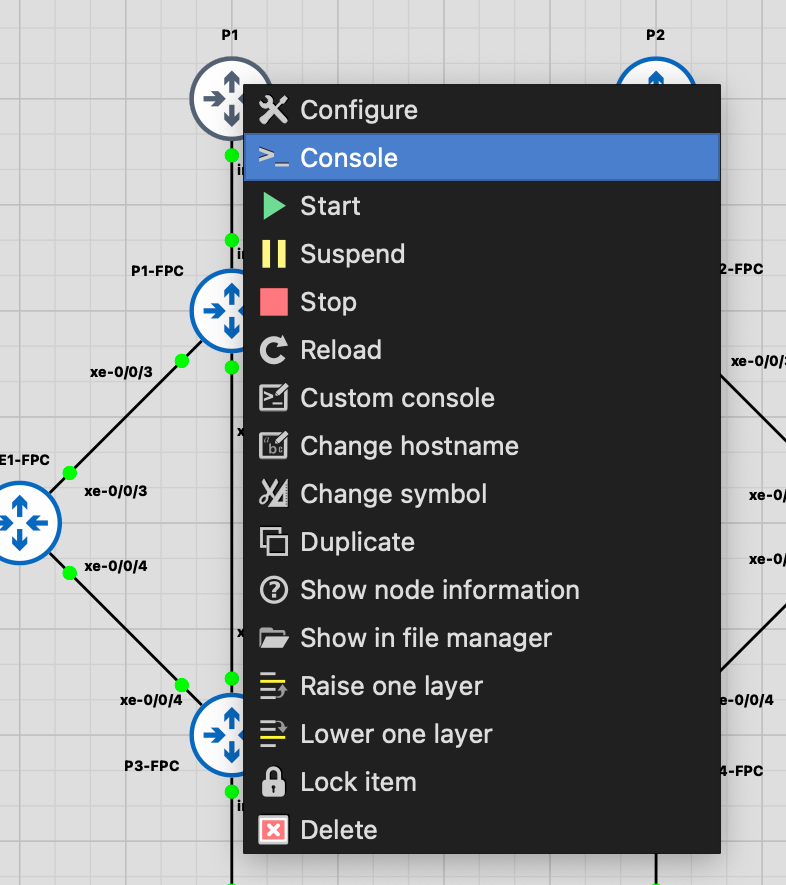
This will open your default terminal appliation and open a telnet session to a specific port of your GNS3 server, which redirects you to the console port of the vMX.
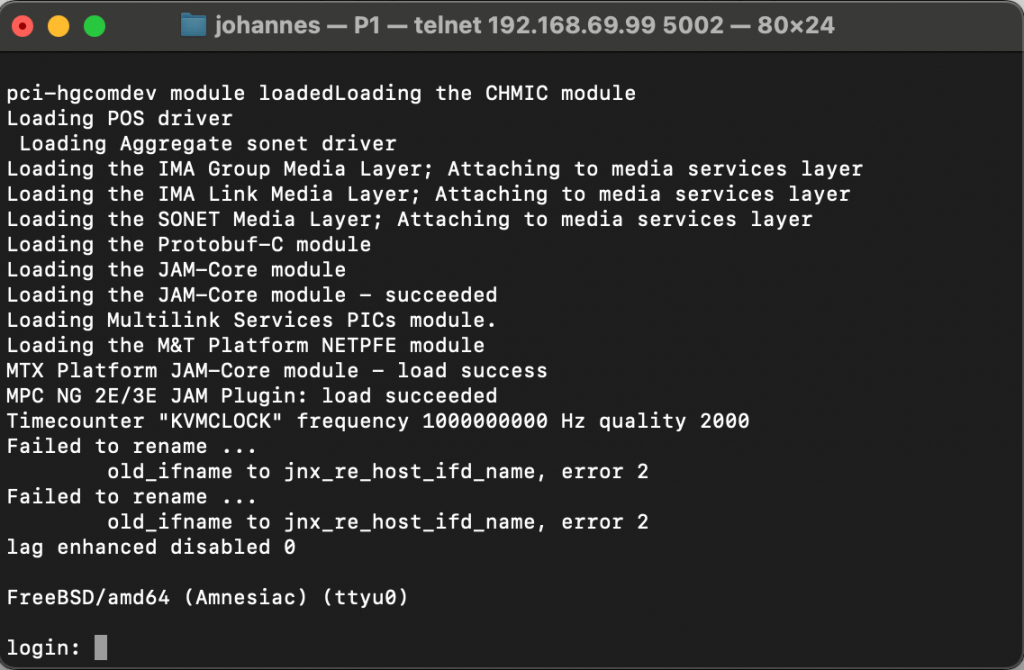
Before we really can configure the device, we need to deactivate one little, annoying feature, which is called ZTP (Zero Touch Provisioning). The router tries to obtain a DHCP lease and via this configure itself. Whilst doing it, it will spam the terminal window with messages, which we don’t want. So please do the following:
login: root

--- JUNOS 20.4R3-S3.4 Kernel 64-bit  JNPR-11.0-20220228.d118be0_buil
root@:~ #

cli

root> edit
Entering configuration mode

[edit]
root# delete chassis auto-image-upgrade

[edit]
root# set system root-authentication plain-text-password
New password:
Retype new password:

[edit]
root# commit
commit complete

[edit]
root#
This will deactivate the feature and set the root password, which is mandatory for the first commit.
Alright, now you can configure your devices as you like. If you want, you can clone my initial configurations for the devices (found here). We will be using this lab soon, so this might be the perfect time.
Alright folks, that’s all for today. I hope you found this article helpful and now have your very own GNS3 server! Until then, have a great day.